
One of the first questions Midwestern applicants ask is a simple but decisive one: where do I actually apply for my Spanish visa? For a long-stay national visa, the answer is never the consulate closest to your future home in Spain, and it is not a matter of choice or convenience. You apply at the Spanish consulate whose jurisdiction covers your current state of legal residence in the United States. For a large part of the American heartland, that consulate is the Consulate General of Spain in Chicago.
On this page
Which states the Chicago consulate serves Apply where you live, not where you're moving Which visas you can file in Chicago Appointments and how they work What to bring to your appointment Apostille, FBI check and sworn translation A sensible sequence to prepare documents Common mistakes to avoid Frequently asked questions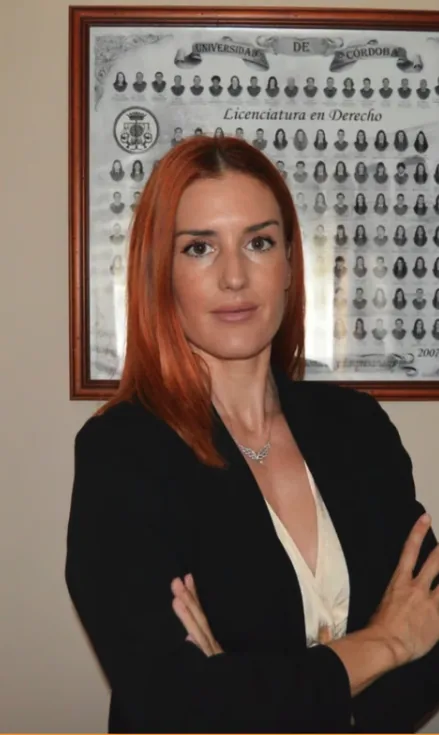
"For most of the Midwest, Chicago is your consulate — not the one nearest where you plan to live in Spain. I always confirm that jurisdiction at the outset, because a file lodged in the wrong office can cost you weeks."
— Lola Jurado · Immigration lawyer, Ilustre Colegio de Abogados de Málaga (nº 10907)
Which states the Chicago consulate serves
The Consulate General of Spain in Chicago is one of several Spanish consular posts across the United States, and each post is assigned a defined territory. The Chicago post serves applicants resident across a group of Midwestern states, with Illinois at its geographic and administrative centre. In broad terms, the Midwest — states such as Illinois and its neighbours across the region — falls to Chicago rather than to the East Coast or West Coast posts.
Consular jurisdictions, however, are set by the Spanish Ministry of Foreign Affairs and are not fixed forever. States are occasionally reassigned between posts, and the precise boundary of the Chicago district can shift. For that reason we deliberately do not publish a hard state-by-state list here: the only authoritative source is the consulate's own website, and you should confirm that your state is currently within the Chicago jurisdiction before you book anything. Applying at the wrong post is one of the most common — and most avoidable — reasons a file is rejected at the counter.
Apply where you live, not where you're moving
The rule that catches most applicants out is this: you file at the consulate for your state of residence in the United States, evidenced by where you genuinely live — typically shown through a driver's licence, state ID, lease, utility bills or similar proof of address. The city or region you intend to settle in within Spain has no bearing on which consulate handles your visa. Someone moving from Illinois to Valencia still applies in Chicago; someone moving from Ohio to Málaga does not apply in Málaga.
This matters because residence must usually be real and documented. If you have recently moved between states, or split your time between two, the consulate will look at where you are genuinely resident. Establishing that clearly, before you apply, prevents a great deal of friction.
Which visas you can file in Chicago
The Chicago consulate handles the full range of long-stay national visas that let you live in Spain. The three most relevant to private clients are:
- Non-lucrative visa — for those who can support themselves from passive income or savings without working in Spain; the classic route for retirees and the financially independent. See our retirement visa guide.
- Digital nomad visa — for remote workers and freelancers who earn their living from foreign clients or an employer outside Spain, allowing you to live in Spain while continuing that work.
- Student visa — for those enrolled in a recognised course, programme or research placement in Spain, typically for a defined study period.
Each visa carries its own documentary requirements, financial thresholds and supporting evidence, and the consulate's checklist for each is the controlling document. The one thing they share is a common backbone of legalised US paperwork, which is where most of the preparation effort goes.
Choosing the right visa category before you assemble documents saves weeks. A non-lucrative and a digital nomad file look similar at first glance but prove very different things.
Appointments and how they work
Long-stay visa applications are made in person, by appointment. You book a slot through the channel the Chicago consulate specifies, attend on the assigned date, submit your complete file and provide biometric data where required. Appointment availability varies through the year and can tighten in busy periods, so it is wise to secure a slot early and have your documents ready to match it, rather than booking first and scrambling to prepare afterwards.
At the appointment the consular officer reviews your file, may ask questions about your plans and means, and confirms what happens next. Processing then takes place after submission; you should not assume a decision on the day. Because requirements and booking mechanics are set by the consulate and can change, always follow the current instructions on its official website rather than older accounts of how the process used to run.
What to bring to your appointment
While each visa has its own checklist, most long-stay applications filed in Chicago rest on a common set of items. Treat the list below as an orientation, not a substitute for the consulate's official checklist for your specific visa:
- The correct, fully completed national visa application form, signed.
- A valid passport with sufficient remaining validity and blank pages, plus passport-style photographs to the required specification.
- Proof of your US state of residence within the Chicago jurisdiction.
- Evidence of financial means appropriate to the visa (for a non-lucrative visa, sufficient passive income or savings; for a digital nomad visa, proof of qualifying remote work and income).
- Private health insurance meeting the consulate's conditions for the relevant visa.
- A criminal background check (typically the FBI check), apostilled and translated.
- Any visa-specific documents — for a student visa, an acceptance letter; for a digital nomad visa, employment or client documentation, and so on.
For a deeper walk-through of the non-lucrative document set in particular, see our note on what documents the non-lucrative visa requires.
Apostille, FBI check and sworn translation
The step that trips up more applicants than any other is legalisation and translation of US documents. Public documents issued in the United States are not automatically accepted by the Spanish authorities in their raw form. They generally need two things before they will be recognised:
- An apostille — the certification under the Hague Convention that authenticates a public document for use abroad. Federal documents, such as the FBI background check, are apostilled by the US Department of State; state-issued documents (like certain vital records) are apostilled by the relevant state authority.
- A sworn translation into Spanish — once apostilled, the document is translated by a traductor jurado (sworn translator) recognised by the Spanish authorities. An ordinary translation is not the same thing and is usually not accepted.
The FBI background check deserves special attention because its timing is delicate. It must be recent enough to satisfy the consulate, yet it also has to be apostilled and then translated — steps that take time. Order it too early and it may go stale; order it too late and the legalisation queue may not clear before your appointment. Sequencing this correctly is a large part of a smooth application. Our dedicated guide on the apostille and sworn translation process sets this out in detail; non-lucrative applicants should pair it with a document validity calendar and a pre-submission file review before attending in Chicago.
A sensible sequence to prepare documents
Because several documents have their own lead times and their own expiry windows, the order in which you tackle them affects whether everything is valid on the day of your appointment. A workable sequence for a Chicago filing usually looks like this:
- Confirm your state is within the Chicago jurisdiction and choose the correct visa category.
- Check the consulate's current checklist for that visa and note every document that needs an apostille and translation.
- Request the FBI background check and any vital records, timed so they will still be current at your appointment.
- Send documents for apostille as they arrive, then for sworn translation once apostilled.
- Arrange insurance and assemble proof of means and residence.
- Book the appointment for a date your fully legalised file can realistically meet.
Handled in this order, the moving parts line up instead of colliding. Handled out of order, applicants routinely find that one stale document forces them to restart a chain that takes weeks.
Common mistakes to avoid
- Applying at the wrong consulate — assuming you can pick a post, or applying based on where you'll live in Spain rather than where you live now.
- Skipping the apostille — presenting a US document without the required legalisation.
- Using an ordinary translation — instead of a sworn translation into Spanish.
- Mistiming the FBI check — so that it expires before, or is not ready in time for, the appointment.
- Relying on outdated summaries — instead of the consulate's current official instructions, which are the controlling source.
None of these is difficult to avoid once you know it exists — but each one, discovered at the counter, can cost you your appointment slot and weeks of delay.
Frequently asked questions
Can I apply in Chicago if I live in a different Spanish consulate's district?
No. You must apply at the consulate that covers your actual US state of residence. If your state is not within the Chicago jurisdiction, you apply at the post that serves it. Confirm the current jurisdiction on the consulate's official website.
Does the city I'm moving to in Spain change which consulate I use?
No. The consulate is determined solely by where you currently live in the United States, not by your destination in Spain.
Do I really need a sworn translation, not just any translation?
For most long-stay visas, yes — documents generally must be translated by a sworn translator recognised by the Spanish authorities. Confirm the exact requirement for your visa.
How current does my FBI check need to be?
It must be recent enough to satisfy the consulate at the time of your appointment. Because it also needs apostille and translation, plan its timing carefully so it is neither stale nor unready.
General information, not legal advice. Consular jurisdictions, visa requirements and procedures are set by the Spanish authorities and change over time; always confirm the current rules on the Consulate General of Spain in Chicago's official website for your circumstances.