
One of the earliest and most consequential decisions in a Spanish visa application has nothing to do with your income, your paperwork or your reasons for moving. It is simply this: which consulate are you allowed to apply at? Spain, like most countries, divides the United States into consular districts, and each district is served by a single consulate that will only accept applications from people who are legal residents within its territory. For applicants living in New York and the surrounding northeastern states, that consulate is very often the Consulate General of Spain in New York. This page explains how consular jurisdiction works, how the New York post fits into it, what to expect from booking to processing, and why applying at the wrong consulate is one of the most avoidable — yet most common — causes of a rejected file.
On this page
The golden rule: apply where you legally reside Which states does the New York consulate serve? Why the wrong consulate is a common rejection cause Booking an appointment What to bring for a non-lucrative or other national visa In-person requirements Apostille and translation Processing expectations After approval: collecting the visa and next steps Common mistakes to avoid Frequently asked questions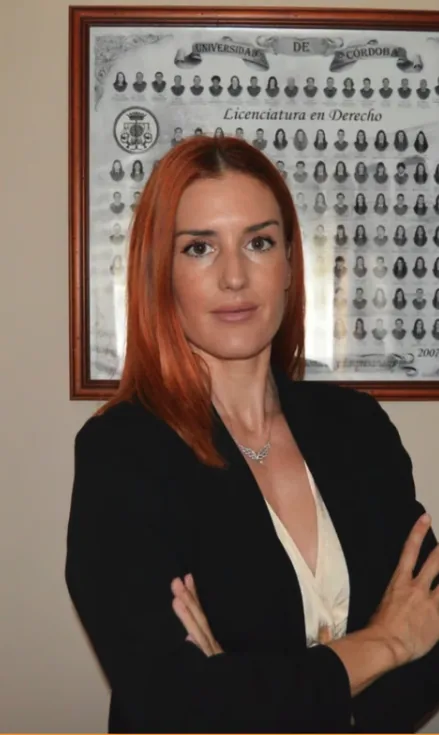
"For much of the northeastern US, New York is your consulate, and the jurisdiction question is the first thing that decides whether your file is even accepted. I settle that at the outset, then build the application to what this office expects."
— Lola Jurado · Immigration lawyer, Ilustre Colegio de Abogados de Málaga (nº 10907)
The golden rule: apply where you legally reside
Spanish national (long-stay) visas — the non-lucrative visa, the student visa, and other type-D categories — must be applied for from abroad, in person, at the Spanish consulate with jurisdiction over the place where the applicant legally resides. This is not a matter of convenience or preference. You cannot pick the consulate with the shortest waiting list, the one nearest a relative, or the one whose appointment portal happens to have an opening. The consulate is determined by where you hold your lawful residence in the United States, evidenced typically by a driver's licence, state ID, lease, utility bills or similar proof of address.
For US citizens and lawful US residents, that place is your US state of residence. If you live in the territory covered by the New York consulate, you apply in New York; if you live in a state covered by Washington, Miami, Chicago, San Francisco, Los Angeles, Houston or Boston, you apply there instead. The principle is simple, but the boundaries between districts are exactly where mistakes happen.
Which states does the New York consulate serve?
The Consulate General of Spain in New York covers a defined cluster of northeastern states. In broad terms it serves New York together with several neighbouring states in the region. Historically this has included New York and a number of nearby northeastern jurisdictions — but the precise composition of each consular district is set by the Spanish Ministry of Foreign Affairs and can be reassigned between posts over time. States that one might intuitively expect to fall under New York are sometimes assigned to the Boston or Washington districts instead.
The practical takeaway is that "I live in the northeast, so I go to New York" is a starting hypothesis, not a conclusion. Two applicants living an hour apart can belong to different consular districts. Verifying your own state's assignment is a five-minute task that prevents weeks of wasted effort.
Why the wrong consulate is a common rejection cause
Consulates are generally strict about jurisdiction because it is one of the few things they can check instantly. If your proof of residence points to a state outside the consulate's district, the file can be refused at the counter or rejected on review — regardless of how strong the rest of your application is. Applicants sometimes try to work around a fully booked appointment calendar by booking at a different consulate, or they move states mid-process and forget that their residence, not their sentiment, controls where they apply. Both routes commonly end in refusal.
A flawless application submitted to the wrong consulate is still a rejected application. Jurisdiction is the first filter your file passes through, and it is unforgiving.
Because Spanish national visas must be lodged in person and cannot simply be re-routed, a jurisdiction error usually means starting the appointment process again from scratch — and appointment slots at busy posts can be scarce. That lost time can matter a great deal if you are working towards a lease start date, a school term, or the expiry of documents like a criminal-record certificate or medical certificate that have a limited validity window.
Booking an appointment
Spanish consulates in the US generally require applicants to book a visa appointment through the consulate's own online system before attending. Walk-ins are typically not accepted for national visas. Because appointment availability at busy posts fluctuates and slots can be released in batches, it is wise to begin monitoring the calendar early — well before your documents are fully assembled — so that the appointment date and your document-validity windows can be aligned.
- Use only the official portal. Book through the consulate's own appointment system linked from its official website, not through third-party sites.
- Match the appointment to the visa type. National (long-stay) visa appointments are distinct from short-stay Schengen or passport/notarial appointments; choosing the wrong category can waste the slot.
- Plan around validity windows. Certain documents expire; sequence apostilles, translations and medical certificates so they are still valid on the appointment date and, ideally, on the decision date.
- Expect one applicant per appointment. Family members generally each need their own slot; confirm the consulate's current practice for dependants.
What to bring for a non-lucrative or other national visa
The exact checklist depends on the visa category, and the consulate publishes its own current requirements — which you should treat as authoritative over any general guide, including this one. That said, national-visa files for categories such as the non-lucrative visa typically revolve around a recognisable set of elements:
- The completed national-visa application form, signed, with passport-style photographs to the required specification.
- A valid passport with sufficient remaining validity and blank pages, plus copies as required.
- Evidence relevant to the specific visa: for the non-lucrative visa this centres on proof of sufficient stable income or savings to support yourself without working in Spain, and private health insurance meeting the required conditions. Our non-lucrative document checklist walks through these in detail.
- A criminal-record certificate covering the required period, apostilled and officially translated.
- A medical certificate in the required form and, where applicable, wording.
- Proof of legal residence within the consulate's district (to establish jurisdiction).
- Proof of accommodation in Spain where required, and the applicable consular fee.
In-person requirements
National-visa applications generally require the applicant to appear in person at the consulate. Biometrics and signature are usually taken on site, and consular staff review the file at the counter. Because appearance is personal, an applicant cannot simply mail the file or send a representative in their place for the core submission; powers of attorney do not usually substitute for the personal appearance in a national-visa context.
For families, each applicant — including minors, subject to the consulate's rules on who must attend — typically needs to be present and to have their own complete file. Plan travel to the consulate accordingly, especially if you live several hours from New York City, and confirm the current in-person and biometric requirements on the consulate's site, as practice can change.
Apostille and translation
Public documents issued in the United States — most importantly the criminal-record certificate, and depending on the case certain civil documents — generally require legalisation for use in Spain. Because both the United States and Spain are parties to the Hague Apostille Convention, this legalisation is normally done by apostille rather than full consular legalisation. A federal criminal-record certificate is typically apostilled by the US Department of State, while state-issued documents are apostilled by the relevant Secretary of State; the correct authority depends on who issued the document.
On top of the apostille, documents not already in Spanish usually need an official translation into Spanish. Consulates typically require translations by a recognised or sworn translator; a casual translation may not be accepted. Sequence matters here: the apostille is placed on the original document first, and the translation should cover the document and, where required, the apostille itself.
Apostille first, translate second, and check the consulate's list of accepted translators. Getting this order wrong is a classic cause of a wasted appointment.
The precise set of documents that need apostille and translation varies by visa type and can change, so confirm the current requirements on the consulate's official page rather than relying on a fixed list. If you are preparing a non-lucrative visa file for New York, work from the document validity calendar and have the file checked through a pre-submission review before the appointment, because a stale FBI check, medical certificate or insurance certificate can derail an otherwise strong application.
Processing expectations
Once a national-visa file is submitted, the consulate reviews it and, for many categories, refers aspects of the decision to the relevant authorities in Spain. Processing times are not fixed and depend on the visa type, the completeness of the file, the season, and the workload of both the consulate and the Spanish authorities. It is prudent to plan for a period of weeks and to avoid making irreversible commitments — such as one-way flights or the surrender of a US lease — until the visa is actually issued.
Consulates may request additional documents or clarification during review, so keep your file organised and respond promptly. Because some supporting documents have limited validity, delays can occasionally require refreshing a certificate; building a little slack into your timeline reduces the risk of a document expiring mid-process. Treat any timeframe you read online — including on this page — as indicative only, and rely on the consulate's own current guidance.
After approval: collecting the visa and next steps
If the visa is granted, the consulate will indicate how and when to collect it — often requiring the applicant to return in person or send the passport in for the visa vignette to be affixed, subject to the post's current procedure. The visa typically permits entry to Spain within a defined window, after which further steps take place inside Spain, such as registering and, for many national visas, applying for the physical foreigner's identity card (TIE) at the appropriate office. These in-country steps have their own deadlines, so read the collection instructions carefully.
Because the post-approval procedure and the in-Spain follow-up steps can change, always follow the specific instructions the consulate provides with your approval rather than a generic sequence.
Common mistakes to avoid
- Assuming jurisdiction. Guessing that your northeastern state "must" be New York without checking the official consular map.
- Consulate shopping. Booking at a different post to skip a waiting list — a frequent path to refusal.
- Skipping the apostille. Presenting a criminal-record certificate that has not been apostilled, or translating before apostilling.
- Using an unaccepted translator. Submitting a translation that does not meet the consulate's standard.
- Letting documents expire. Assembling everything early, then finding a certificate has lapsed by the appointment date.
- Wrong appointment type. Booking a Schengen or passport slot instead of a national-visa slot.
- No proof of residence. Failing to bring documents that establish you legally reside within the district.
Almost every item on this list is avoidable with preparation, and the single most important piece of preparation is confirming — from the consulate's own website — both your jurisdiction and the current document requirements before you commit time and money to assembling a file.
Frequently asked questions
Can I choose the New York consulate if another post is closer?
No. You must apply at the consulate with jurisdiction over your state of legal residence. Confirm which post that is on the official consular website.
Which states does the New York consulate cover?
It serves New York and several neighbouring northeastern states, but the exact list is set by the authorities and can change. Verify the current jurisdiction for your state on the consulate's official site.
Do I have to apply in person?
National (long-stay) visas generally require a personal appearance for submission and biometrics. Confirm the current in-person rules with the consulate.
Does my criminal-record certificate need an apostille and translation?
Typically yes — a Hague Apostille plus an official Spanish translation. Apostille first, then translate. Requirements vary by visa type, so check the current checklist.
How long does processing take?
It varies by visa type and season and is not fixed. Plan for a period of weeks and avoid irreversible commitments until the visa is issued.
General information, not legal advice. Consular jurisdiction, appointment procedures, document requirements, fees and processing times are set by the Spanish authorities, vary by visa type and can change. Always confirm the current requirements and your consular jurisdiction on the official website of the Consulate General of Spain before you act. This page does not state any specific fees or addresses.